
We may earn a commission if you buy through links on this page, at no extra cost to you. We only link products that are actually in our van (or clear shopper alternatives we name as such).
The roof compressor is why the electrical kit is the size it is. We hike. The animals stay in the van. The van has to stay a house. This is the Nomadic we bought, the hole we cut, and the 48-to-24 path that feeds it.
What we actually installed
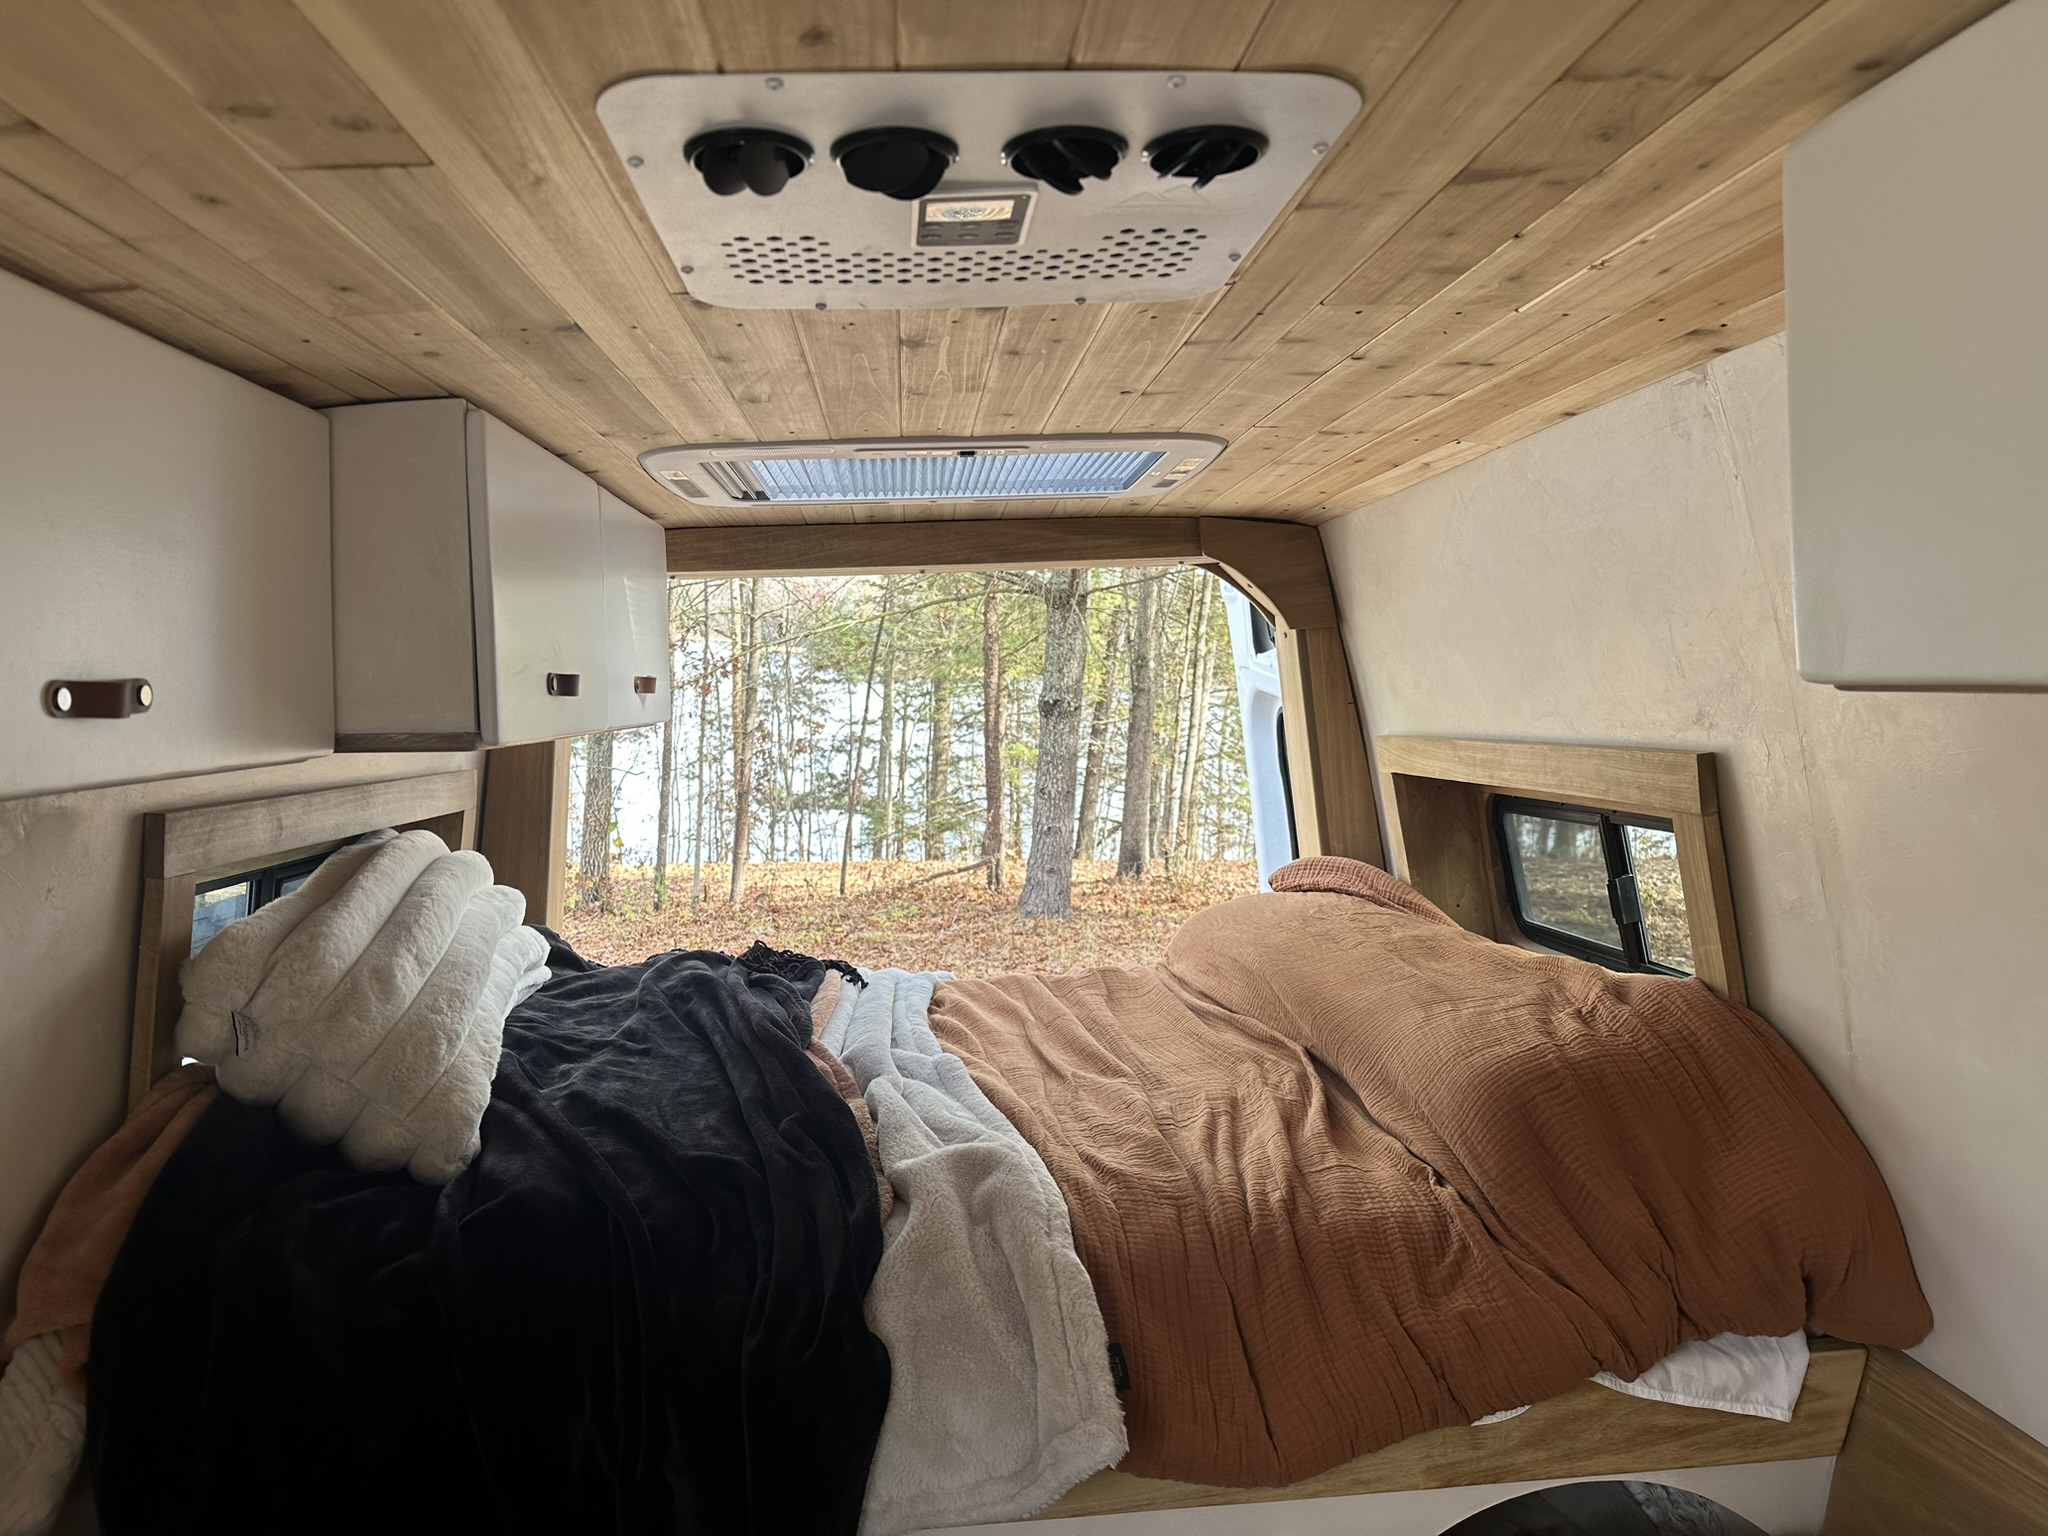
Nomadic Cooling X3 Standard 24V. Obsidian Black exterior so it sits in the Flatline Safari rack (SP0108B) instead of reading as a white RV box on a black rack. White powder-coated metal interior faceplate, because Brittany wanted that plate to live with the MaxxAir and the Arctic Tern, not fight them. DIY install kit with the premium dual-layer gasket.
Order total $4,677 — $4,478 already paid, $199 balance for Obsidian Black. That is the receipt.
24V, not 12V. The 12V X3's startup current was too high for the EcoFlow Independence Kit. 48V Helix did not exist as a 24V option later either — Helix is 12V or 48V only. If you are building a similar EcoFlow 48V van today, buy Helix 48V and skip our regulator. Our van is still Standard 24V, black shell, white plate, 48V-to-24V in the garage.
Rules we followed
Nomadic's NC-X3 install manual is the procedure. The boring parts that actually matter:
- Industry hole is 14 in × 14 in. Cut from the outside. Do not cut a rib.
- Dry-fit before sealant. Center it. The gasket is the weather seal; do not glue the top of it.
- Hand-tighten the four mounts, then about a quarter turn (Nomadic says ~4 lb). No drill. Over-torque spins the bolt in the base plate and voids the warranty. Over-compression also lets the fan rub the shroud.
- LCD and control harness on before you apply power. 2 AWG minimum on 12/24V. A fuse/breaker at the source is mandatory. Nomadic's 12V book calls 125A; our 24V run sits behind a 100A on the 48V side of the regulator.
- Foam separator between supply and return or you just blow cabin air into the ceiling cavity.
Materials
- Nomadic X3 Standard 24V, Obsidian Black, white interior faceplate
- X3 DIY install kit for 24V — 15 ft harness (2 AWG on 12/24V kits), cardboard 14×14 template, premium dual-layer gasket, polyurethane, thermo tape, heat shrink, threadlocker, zip-tie plates, trim ring if you want it
- Rust-preventative paint for the cut edge
- Painter's tape and a permanent marker
- Alcohol / PrepSol for the roof skin
- Wood or aluminum interior support ring if your ceiling thickness needs it. We finished to the white faceplate; the ring is for builds where the headliner float is huge.
- From the garage, already covered on the EcoFlow page: Independence Kit 10kWh, 100A breaker, 48-to-24 regulator, official EcoFlow 48V appliance cable (or the stock cable I cut)
Tools
- 1/8 in bit for the four corner witness holes
- Jigsaw, nibbler, or cutting wheel. A nibbler is kinder on a painted roof.
- File / sander for the edge
- Tape measure, square, 1:1 cardboard template from the kit
- One other human for the lift. The X3 is a one-person-plus-a-spotter job, not a hero lift.
- Hand tools only on the four mounts. Torque screwdriver if you do not trust your wrist. Not an impact.
- Multimeter
Roof map before you cut
The 14×14 is permanent. Everything else on the roof negotiates with it.
On XPLRE the roof is, front to back in practice: MaxxAir over the living space, Arctic Tern electric skylight (receipt $1,905.88, cutout about 500×700 — Tern is discontinued; shoppers now look at Dometic Heki 2 Deluxe 9104119560, which is a larger hole, about 960×655, and a manual crank, not a drop-in), Nomadic over the bed, bathroom dome, four small ceiling pods, Flatline Safari SP0108B about 4 in off the roof with the LED spots and the bin. White body, black hood wrap, two flexible hood panels.
Put the X3 in a factory-flat bay between ribs, aft enough that the shroud clears the rack crossbars and the Tern, and so the interior faceplate lands over the bed rather than over a cabinet. Confirm the Flatline bars will still clear the X3 cover. Black shroud is why we paid the $199 upcharge — it disappears in the rack.
Never cover the top fan. Leave service room around the shroud. Do not cut a structural rib. If the 14×14 wants a rib, move the hole, do not notch the rib.
Install — the Nomadic procedure, on this van
1. Mark and cut from the outside
Tape a 14×14. Use the cardboard template. Measure to the ribs, to the Tern, to the rack feet, then measure again. Multiple marker passes. Drill a 1/8 in hole at each corner so you can find the square from inside. Cut on the line. File the edge smooth. Paint the raw metal the same day. Metal chips on a white roof become rust freckles by the next rain.
2. Clean, then gasket
Alcohol the paint. Dry. Premium dual-layer gasket from the DIY kit goes down now. Sticky side to the roof. If the roof is crowned, trim the gasket to the contour with a blade — do not force a flat gasket into a wave and call it sealed. Do not put adhesive on top of the gasket. Window-weld around the outside of a standard gasket if that is the one in your box; the premium gasket is the better weather story and is why we bought the DIY kit.
3. Dry-fit the unit
Two people. Set the X3 onto the gasket without dragging a mounting bolt across it. Center all four sides. Confirm the top fan is free and the shroud clears the Safari bars. Lift it back off if the gasket folded. A folded gasket is a leak, not a it-will-crush-flat.
4. Crossbars and torque
From inside: crossbars onto the four M8 studs, washers, first nuts. Hand tight, then about a quarter turn. Nomadic's number is about 4 lb. You want the gasket just compressed, no daylight, unit sitting on the gasket and not on the roof skin. Gasket is also the vibration isolator and does not want more than about 10% crush. If you hear the indoor fan tick the housing, you over-did it — back the nuts off.
No drill. Over-torque spins the stud in the base plate. That is a warranty conversation you will lose.
If you bought the interior trim ring, it goes between roof and unit before the bars, not after.
5. Electrical, in this order
- Land the LCD / control harness on the unit. Condenser lead is to the left of the black. Those thermostat wires are easy to snap. Do this before power.
- 48V out of the Independence Power Hub, through the 100A breaker in the garage, through the 48-to-24 regulator, then the 24V DIY harness up the wall and into the X3. 2 AWG on that 24V run. Support it. Grommet every metal pass. I cut the 48V lead from EcoFlow stock; buy the official 48V appliance cable if you are doing this now.
- Fuse / breaker at the source stays in the path. Ours is the 100A on the 48V side. Do not skip it because the hub has protection.
- Then apply power. LCD first was the rule. Power second.
Anderson connectors showed up on older Nomadic harnesses and on some DIY kits. Newer units leave the roof with ring terminals. Match what is in your box. Do not assume a video's connector is yours.
6. Air separator and faceplate
Foam separator (Option A or B in the manual) between supply and return. Deep roof? Stack two. Without this, you condition the ceiling cavity and wonder why the bed is still warm.
White powder-coated faceplate last, self-drilling screws into the finished ceiling, not into a floating wool batt. Brittany's wood-slat ceiling is why the plate is white. The four-vent look is the X3, not a house HVAC cassette we invented.
7. Commission
Doors closed. MaxxAir on low to move the first dump of ceiling heat. X3 on. Confirm the compressor starts, the faceplate is blowing cold, and the EcoFlow console is not folding the DC bus. Walk away for an hour. That is the same acceptance test as the electrical page: animals in, we are not.
How it lives with the rest of the roof
MaxxAir is the night moisture fan and the first-pass heat dump. The Tern is light and a weather hole over the bed — electric on ours, discontinued, so we are not going to pretend you can still buy that exact unit. If you are cutting a skylight now, Heki 2 Deluxe 9104119560 is the honest larger-opening alternative, and you will be cutting a different hole. Bathroom dome is its own wet-room fan. Do not ask the X3 to dehumidify a shower.
Comfort Hot in the garage is heat. The X3 is not a heat pump we use as a furnace. Different job, different appliance.
Gotchas
- Obsidian Black + white plate is what we bought. Do not copy a white-shroud catalog shot onto this van.
- $4,677 is the number on the receipt.
- 24V Standard via a regulator, because 12V startup current was too high for the Independence Kit.
- Helix 48V is the shopper path now. Mentioned once, on purpose. Our install is not Helix.
- Cut from outside. Paint the edge. Dry-fit. No adhesive on top of the gasket.
- Hand torque. Fan rub means you crushed it.
- LCD before power.
- Separator or you are air-conditioning the wool.
- Do this hole before the ceiling slats. The conversion page has the order.
The kit that feeds this: EcoFlow page. The shell: insulation page. The rest of the van: conversion page.

